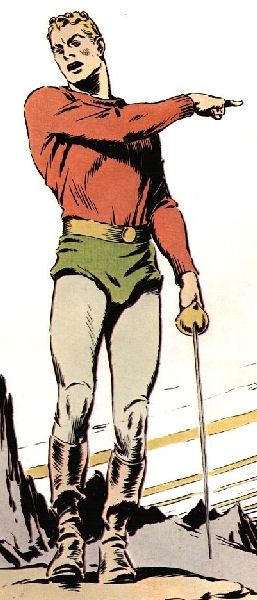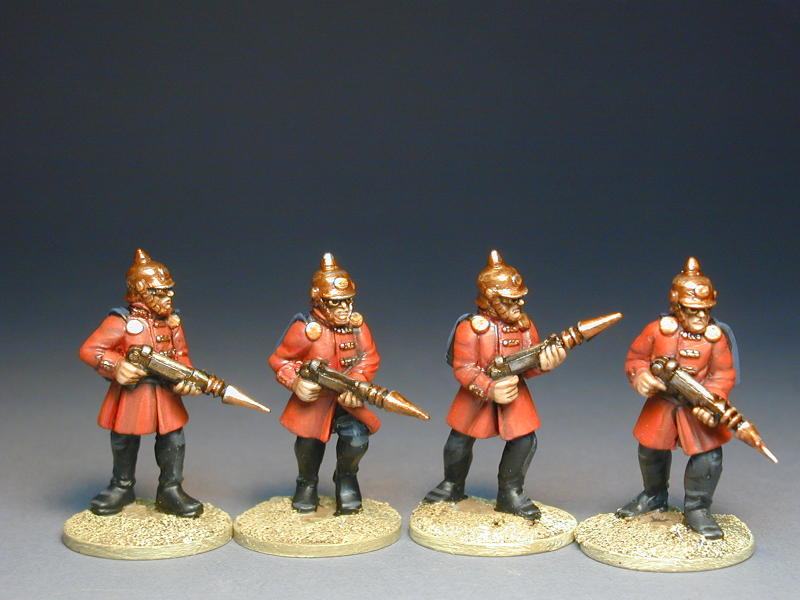
In the cracking original Alex Raymond comic strips Ming and all his palace guards are yellow skinned and oriental in style, much like many pulp villains of the 1930's whilst good for Ming (although I favour green skin over yellow ala Defenders of the Earth myself) the look I wanted for my palace guard was that which has already been excellently captured by Graven Images and their 40mm Flash Gordon range which I first saw on Dampfpanzerwagon's blog...
With just a bit of digging and some internet searches for picklehaub helmets I discovered that early World War I Germans in picklehaub helmets look almost identical to them.
So with a target in mind I first checked out the Peter Pig miniatures. As they had no photos of thee particular miniatures on their website they were kind enough to bring some along to Salute for me to have a look at. Sadly they were too 'kitted out' with pouches and paraphernalia for my liking so I opted not to grab them (but did buy a swath of their Red Alien range for my main protagonists). I did find a few more picklehaub Germans with other suppliers but none of them leapt off the web at me.
After much more searching of miniatures from different era's and different companies I saw something on Eureka's site that fitted the bill and I also tracked down a UK supplier in the form of Fighting 15's. So I have decided to order a pack of their Schleswig-Holstein 1848 infantry. The helmets are very close to what I'm looking for and the figures seem to have no additional detailing other than their uniforms. Now, I have no idea if the scale will fit in with my Peter Pig hero's (like the problem I have with my chosen figure for Zarkov) but for £3.20 I might as well order a pack anyways.
I am going to have to sculpt a little half cloak on them and change the end of their gun for something pointy but I think in the scale they are they'll look pretty good.
Laters,
Craig
Thursday, 16 April 2009
Tuesday, 14 April 2009
15mm Flash Gordon Photograph !
I figured out the camera and here is the first picture of my 15mm Flash Gordon miniature. The photography is not perfect but you can get the idea :) The expertly chosen brown backdrop is my wallet
It is one of Peter Pig's Red Alien's, you can see it on their picture on thier website, it's the one on the far left of the image below, the one aiming down the barrel of his gun...
And below is my painted version...
I'm quite chuffed with it, it's not brilliant but definitely tabletop gaming quality.
It still has a few bits left to do as mentioned in my previous post. Comments welcome and advice taken on board (please be gentle though!)
C.
Gordon's Alive ! - Painting a 15mm Miniature
I say again these mini's are really bloody small ! But I carried on regardless, this Bank Holiday weekend in between gardening, in-laws and me and my partner, Em's, April boardgames day I managed to get some time in to paint my first 15mm miniature.
Sadly I have no in progress pictures as I was too excited and just got on with it, next time I will aim to do better as a blog with no pictures (and my somewhat lacking prose style) does not a riveting read make.
First thing I decided on was how to base them. After some good advice from a variety of folks here I decided on 15mm steel washers as I like the magnetic storage potential, sadly I only had four of them in, so armed with super glue and paper (to cover the hole) I based the miniature I was going to use as Flash, the 'straightened' female figure I had singled out for 'action Dale' and two others from Peter Pig's Fantasy Red Alien range which I was going to use as practice.
After the glue had dried I whipped out my ancient can of Citadel Chaos Black spray and let them have it. Once dry I saw some still silver areas on all four miniatures and gave them another blast. Then once dry I saw some more silver areas and blasted them again. Then I saw some more silver areas and once more gave them a blast. This time once dry I had (mostly) covered up all the metal and was ready to paint. I dug out my (also ancient) box of Citadel paints and started on my first character, Flash Gordon.
At this point I changed my mind as to which figure to use for Flash, I liked the action pose of the 'firing' Red Alien as opposed to the relaxed pose of the Red Alien Hero. 15mm miniatures really do look better with an undercoat on, you can see previously unnoticed detail and the pose much much better than when in base metal. The GZG figures I saw on display at Salute in light grey looked really good, I only wish all their mini photo's on their webstore were done in this way.
So after this small change I got the littlest brush I owned, took off my glasses (as I could not focus on the mini with them on) and started applying bits of pigment to the tiny little metal man. Always a fan of Kevin Dallimore's painting tutorials on Foundry (before they decided to remove them and publish them in a book) I always start a mini with the face to give it some character. A few swathes of Bronzed Flesh and Flash looked a bit more human than Red Alien. Next up I went for his shirt which proved to be a bit tricky due to the chest belt thing he was wearing. I used the very dark Scab Red as my base colour as although on my 15mm adventure I wasn't planning on doing Dallimore's three paint method for all of it, the pigment in red is always a bit pap so I start dark and build up. Next up was his hair, I went for Sunset Yellow on the black wavy locks, then I got some Ultramarine Blue and quickly daubed his trousers, I ignored the sculpted loincloth as the front piece is barely noticeable and the back one looks like a bag/pouch attached to the belt. Then I used some good old Chaos Black to tidy up any errant strokes (of which there were surprisingly few) having been splodging for twenty minutes and took a look at my master piece. Hmm, my first thought was 'that's crap' but after a few more glances and some better light it looks okay. Definitely okay for the first colours for tabletop gaming standard anyways.
I had a bit of a break and later that day I went back to it. I used Snakebite leather on all the belts opting not to go for yellow as I didn't want it to clash with his hair. I was surprised how good it looked, giving him a pulp 1930's adventurer feel. I then mixed a bit of Bleached Bone with some Sunset yellow and highlighted his blonde locks and put a light drybrushing of bronze on his pistol. I like the steampunk feel of bronze weapons so you'll probably see this across all my mini's instead of brightly coloured blasters as per the comics.
At this point I also did a quick 50/50 water/wash of Flesh Wash on his skin. This turned out to be a mistake as it turned him a David Dickinson orange fake tan colour. Out came the Bronzed Flesh and Bleached Bone and after some work I thought it looked okay so I stepped away (knowing when to walk away from a mini's paint job is always so tricky).
Then I put a quick bit of Boltgun Metal on his sword blade and some Shining Gold on the hilt/pommel and he looked okay. I did take some pictures at this point but they're worse than crap. Will take some practice to photo 15mm mini's I feel.
And that was as far as I got, all in all about 30-40 minutes for a hero character.
I still have to highlight the shirt with a lighter red (which I don't have at the moment) and highlight the blade with Mithril Silver. I'm also considering highlighting his trousers to make them look a bit more worn but I'm not sure, similarly I may put a bit of lighter brown on the belt/bag/holster.
Tonight I'm going to add some basing materials and attempt to take some photos. I also might try and make a start on Dale. I have ordered 100 more 15mm washers from eBay for the grand price of £2.80 including postage so I can base up my squad of Ming's robot henchmen (Automatons from Alternative Armies) and actually get a game in !
Laters,
Craig.
Monday, 6 April 2009
Flash Gordon - Coming Soon in Colour !
So one week and a bit after Salute (in between DIY tasks) I am going to try and paint my Peter Pig supplied 15mm Flash Gordon.
The first thing I found about 15mm is that they are really bloody small. I know this might seem obvious to most people but I'm not sure I was expecting them to be quite so small. However not to be deterred I am going to go for it.
I've been umming and ahhing about what colour to paint him but I think I've decided to go with the 80's cartoon scheme (which is the same as dampfpanzerwagon did with his 40mm Flash Gordon) but also it matches up with some of the comics.
Now I have no idea how this is going to go, I am an extremely slow novice level painter and have never painted anything this small.
Before unleashing the coloured gloop I first need to base the tiny little man. After checking out a variety of forums I've decided to go for small steel washers (and shall be purchasing some this evening) but I am going to compare the to 1p coins as well as I know a lot of people favour them.
I also might try a test paint on one of the other 'Red Martians' I have, I'll try and take some photos as I go but not sure how the macro function on my camera will perform.
Am quite excited and will let you know how I get on...
Craig
Subscribe to:
Posts (Atom)